Drawer Zen: 6 Steps to Calm, Clutter-Free Drawers
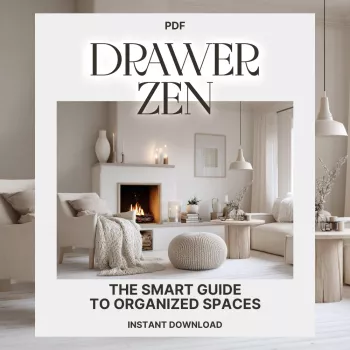
Drawer Zen: A Practical System for Calm, Clutter-Free Drawers
Orderly drawers make daily routines easier: fewer lost items, faster mornings, and less visual noise. A drawer doesn’t need to be “perfect” to feel peaceful—it just needs clear categories, a simple layout, and a reset routine that’s realistic. Below is a repeatable approach for sorting, assigning “homes,” and keeping drawers calm long after the first tidy-up, inspired by Drawer Zen: The Smart Guide to Organized Spaces (digital download).
Why drawer organization feels so relieving
Drawers are small spaces with high impact. When they’re chaotic, they create tiny moments of friction all day long—and those moments add up.
- It reduces “micro-stress.” Searching for keys, socks, chargers, or measuring spoons raises your mental load in a way that’s easy to underestimate. Research has linked clutter with difficulty focusing and increased stress at home (see Princeton’s summary on clutter and focus and the UCLA Center on Everyday Lives of Families).
- It creates boundaries that prevent re-cluttering. Drawers work best when every category has a defined space. “Loose piles” don’t have edges, so they spread.
- It makes cleaning easier. Fewer loose items means a faster wipe-down and a quicker reset after cooking, getting ready, or homework time.
- It supports better habits. If putting something away takes two seconds and doesn’t require rearranging, it happens more often.
The Drawer Zen method in 6 steps
This system stays practical because it’s the same sequence every time. No reinventing the wheel per drawer.
Step 1 — Empty completely
Remove everything so you can clean crumbs, dust, and residue. This also helps you notice what the drawer can realistically hold. Wipe it down, let it dry, and take quick measurements before anything goes back in.
Step 2 — Quick sort into categories
Group items by function, not by where they “used to go.” For example: “charging,” “hair tools,” “first-aid,” “baking tools,” “batteries,” “small tools,” or “everyday jewelry.”
Step 3 — Declutter with simple rules
Keep what is used, needed, or truly loved. Remove duplicates, expired items, and “mystery objects” that don’t earn a category. When in doubt, reduce to the best one (best pen, best spatula, best nail clipper), then store backups elsewhere.
Step 4 — Assign zones
Put frequent-use items front and center; occasional items can go toward the back or in higher drawers. Make the easiest zone the one you want everyone to use—especially in shared spaces.
Step 5 — Add structure
Use dividers, small bins, trays, or even sturdy repurposed boxes so categories don’t migrate. This is where drawers stop sliding back into chaos—because the “edges” do the work for you.
Step 6 — Label lightly (when helpful)
Labels shine in shared drawers (kids, partners, guests) and for similar-looking categories (different batteries, different chargers). Keep it minimal: a simple word is enough.
Measure first: the 2-minute setup that prevents frustration
Buying organizers first is a common trap. Measuring first prevents the “almost fits” problem and helps you choose modular pieces that can evolve with your needs.
- Measure inside width, depth, and height of each drawer before shopping.
- Note drawer obstructions (curved sides, rails, or lip edges) that affect fit.
- Plan for grab space: leave a little finger room above inserts so items lift out easily.
- Choose flexible organizers (modular bins over one large tray) to make seasonal swaps simple.
Organizer sizing cheatsheet
| Drawer type | Best organizer approach | Notes |
|---|---|---|
| Shallow (1–3 in) | Low-profile trays + mini dividers | Ideal for stationery, makeup, utensils; avoid tall bins that block closing |
| Medium (3–6 in) | Modular bins (mix of small/medium) | Best for socks, tools, pantry packets; add one “misc” bin only if needed |
| Deep (6+ in) | Vertical bins + stacked containers | Use categories with lids or taller dividers; keep heavy items toward the back |
Room-by-room drawer plans (simple category maps)
What to do with the ‘misc drawer’ (without giving up)
Maintenance that actually sticks
When stress is already high, systems need to be simple enough to run on autopilot. The American Psychological Association notes how stress affects daily functioning—so small reductions in friction (like not searching for basics) can matter more than they seem.
Tools and guides that make drawer organizing easier
If you want a repeatable checklist, a printable plan, and a consistent method across rooms, Drawer Zen: The Smart Guide to Organized Spaces (digital download) is designed to help you move from “stuck” to “set up” in short sessions.
- Black Cat Reflective Laser Phone Case for iPhone — if phones and accessories land in an entryway drawer, a durable case helps protect what gets tossed in and out daily.
- Electrical Lockout Tagout Kit – 47-Piece Complete Safety Set — for garages or utility drawers, dedicated kits keep safety items together so they’re findable when needed.
- Platinum Men’s Ring with Moissanite Diamond — jewelry stays calmer when stored in a defined compartment; high-value pieces benefit from a consistent “home” rather than roaming surfaces.
FAQ
How long does it take to organize a drawer from start to finish?
A small drawer can take 10–20 minutes, while a deep or overflow drawer may take 30–60 minutes. Measuring and sorting first speeds everything up, and adding dividers is usually the step that makes the result last.
Do organizers need to match, or can different bins work together?
Different bins can work together as long as they fit well and create clear category boundaries. Neutral colors and a non-slip liner can add visual calm, and leaving a little breathing room prevents snagging and spills.
What should go in the front vs. back of a drawer?
Use the frequency rule: daily items go in front, weekly/occasional items go toward the back. Keep heavy items stable, contain sharp items safely, and place kid- or guest-friendly items where they’re easiest to reach.












Leave a comment